


This guide shows you how to access cPanel through the WebPanda Client Area and change the password for an existing WebPanda email account. You can watch the video below or follow the written steps.
1. Log in to the WebPanda Client Area
Open your web browser and go to cloudpanda.co.za. Click Account, then Login.
Sign in using the personal email address you used when signing up for WebPanda services. This is not the WebPanda email address you created in cPanel.

2. Log in to cPanel
In the WebPanda Client Area, find the hosting service for your domain and click Log in to cPanel.
cPanel will open automatically, so you do not need to enter a separate cPanel username or password.

3. Open Email Accounts
In cPanel, scroll to the Email section and click Email Accounts.

4. Select the email account
Find the email address whose password you want to change, then click Manage next to that account.

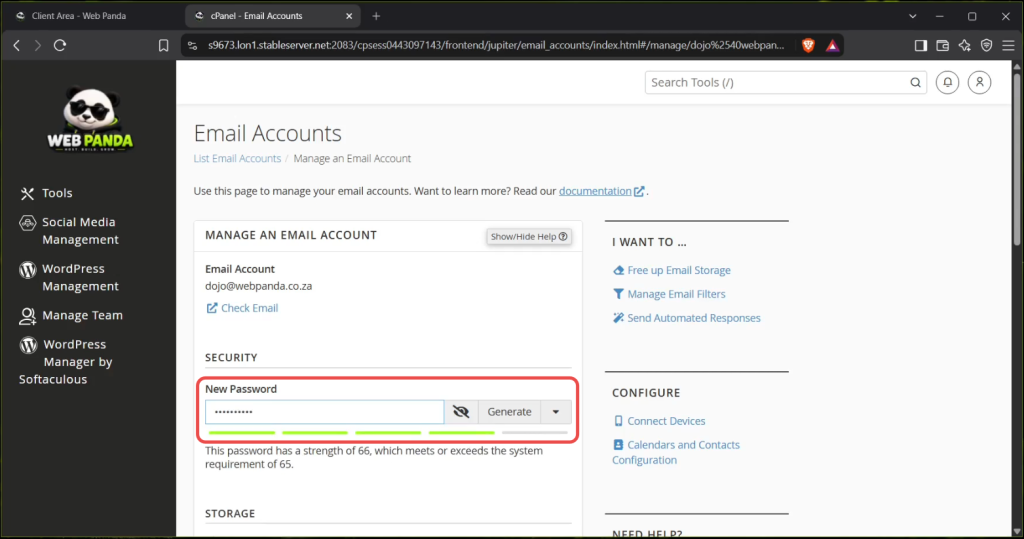
5. Set a new password
Under the Security section, enter a new password for the email account.
You can either enter your own strong password or click Generate to let cPanel create one for you.
Save the new password in your password manager, as you’ll need it when updating the email account on your devices.
6. Save the new password
Scroll to the bottom of the page and click Update Email Settings.
cPanel will confirm that the changes have been saved successfully.


Update your email apps
After changing the password in cPanel, update the saved password in any email apps or devices that use this account, such as Microsoft Outlook, Apple Mail, or your phone.
Until you update those credentials, the app may show a password or authentication error.